With you picture already chosen:
Click on the black ad white circle in the layers menu and choose hue/saturation

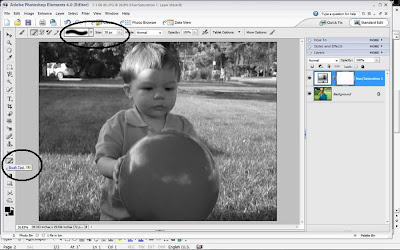
In the pop-up box, slide saturation all the way to the left. This will turn your picture black and white. Click OK.

Choose the brush tool.

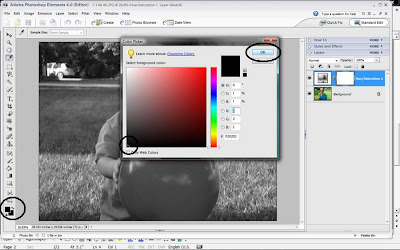
Make sure your fore ground color is black. Click OK.

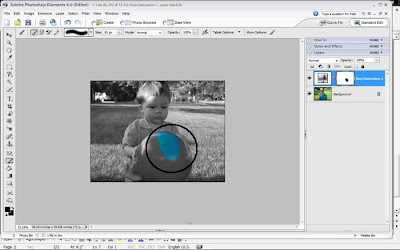
While holding down the left mouse button brush over the part of your pic you want to be colorized. The color will return.

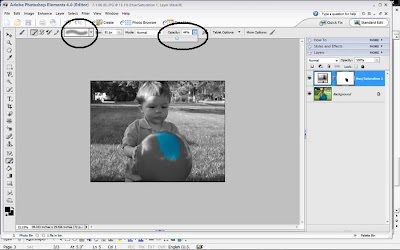
Now, if you don’t want the original color to come back quite as bright, click on the opacity button and adjust it down to your liking. Brush over the area and see the difference.

If you happen to accidentally brush over an area you don't want colorized, you can do one of two things. You can go up to edit and click on undo. Or, you make your fore ground color white and brush over that area and it will return to black and white.
When you’re done, save your pic using "save as: so you don’t save over your original picture.
Directions provided by: Scrapbook Memories
Give this technique a try and send me your completed works of art. I will be happy to show them off here. Don't forget to include a link to your blog/website!
Enjoy and have fun!!
1 comment:
Thanks, Paula...!!!..nathan looks so young!!
Post a Comment